Why Moving Preparation Matters More Than Most Woodworkers Realize
Most woodworkers focus all their attention on tuning a bandsaw for cutting performance and give almost no thought to what happens when the saw needs to be moved. The reality is that a move puts more sudden stress on a bandsaw’s tensioned blade, wheels, and guide assemblies than months of normal use. A saw that was perfectly tuned before a move can come out the other end drifting, vibrating, or cutting rough, even though nothing was technically “broken.” Taking twenty minutes to prepare a bandsaw properly before it goes on a dolly or into a truck protects the precision setup that took real effort to dial in, and it saves hours of re-tuning once the saw reaches its new home.
Signs Your Bandsaw Wasn’t Properly Prepared for a Move
- Blade tension feels noticeably different than before the move, even without adjustment
- New burn marks or rough cuts appear on material the saw used to cut cleanly
- The blade no longer tracks centered on the wheels
- Flat spots or new cracks are visible on the rubber tires
- Guide bearings or blocks have shifted out of their previous adjustment
- The table is no longer square to the blade
- Unusual vibration or noise that wasn’t present before the move
- Loose fasteners or knobs that worked free during transport
Understanding Blade Tension and Why It Should Never Travel Tight
A tensioned bandsaw blade behaves like a coiled spring wrapped around two wheels, and that stored tension has nowhere productive to go during a bump, tilt, or sudden stop in transit. Every jolt transmits force directly into the wheels, tires, and frame. This is the single most common cause of post-move problems, and it is also the easiest to prevent. Backing off tension fully before any move, even a short one across the shop, removes the load that would otherwise concentrate stress on the weakest points in the system. For longer trips, removing the blade entirely is the safer choice rather than leaving it loosely seated on the wheels. If the blade is already worn, this is also a good moment to check a trusted source for replacement blades before reassembly.”
The Often Overlooked Role of the Wheels and Tires During Transport
The rubber tires on bandsaw wheels are sensitive to sustained pressure in one spot, which is exactly what happens when a saw sits loaded with a tensioned blade for hours during a move or sits unused afterward in storage. Flat spotting develops gradually and is easy to mistake for a tracking problem rather than what it actually is, which is tire damage. Rotating the wheels slightly before a move and again during any extended storage period keeps the contact point from staying fixed in one place. Avoiding pressure against the wheel housings while loading and unloading the saw protects both the tires and the wheel bearings underneath them.
Moving Preparation Checklist by Move Type
| Move Type | Blade | Table | Guides |
|---|---|---|---|
| Short shop reposition | Release tension fully | Leave at 0 degrees, lock tilt | Lower upper guide, secure |
| Across town or building | Remove blade, coil and label | Lock tilt mechanism | Lower and tape adjustment knobs |
| Long distance or storage | Remove blade, store separately | Remove throat plate if loose | Fully retract and secure both assemblies |
| Saw will be laid on its side | Remove blade entirely | Confirm table is fully secured | Retract guides, pad exposed posts |
How Frame and Table Alignment Get Knocked Out of True
Dragging a bandsaw across a floor instead of rolling it on a properly rated dolly is one of the fastest ways to rack the frame out of square, even on machines built with heavy cast iron components. Once the frame shifts even slightly, the table is no longer truly perpendicular to the blade, and every cut afterward carries a small angle that compounds over the length of a board. This kind of misalignment rarely announces itself loudly. It shows up gradually as cuts that don’t quite match a layout line, which is why checking table alignment is a required step after every move rather than an optional one.
Proper Pre-Move Preparation Steps
- Disconnect power to the machine before doing anything else
- Release blade tension fully, or remove the blade for longer moves
- Coil and label the blade if it is being removed, keeping teeth protected
- Lower the upper guide assembly and lock it in place
- Return the table to 0 degrees and lock the tilt mechanism
- Tape or secure any knobs and levers that could shift during transport
- Confirm motor mount bolts are tight if the model allows access
- Coil and secure the power cord so it cannot snag or drag
- Use an appliance dolly rated for the saw’s weight, not a standard hand truck
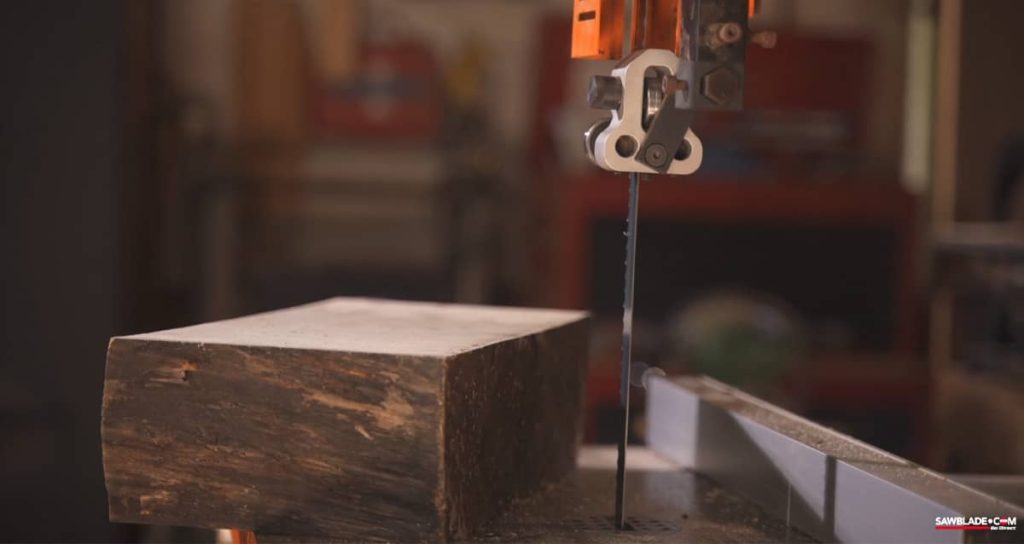
Setting Up Guides and Thrust Bearings After Reassembly
Once the saw is in its new location, the guide assemblies need to be checked even if they looked untouched during the move. Side guides should sit close to the blade body without touching it when the blade is idle, engaging only under cutting pressure. The thrust bearing should sit just behind the blade gullets, close enough to support the blade without contacting it at rest. Resetting both the upper and lower guide assemblies after a move takes only a few minutes and prevents the gradual heat buildup and premature wear that comes from guides left slightly out of position. Pairing fresh guide settings with the right blade for your machine ensures the saw performs at its best once it’s back in use.
ALSO WORTH READING
Ready to Tackle Thicker Stock?
If you’re planning to resaw thick lumber, having the right blade makes all the difference between smooth cuts and frustrating results. We put together a practical guide covering the top bandsaw blades specifically designed for resawing, comparing tooth patterns, blade widths, and performance across different wood types. Whether you’re slicing veneers or breaking down rough lumber, it’s worth a look before your next project.
Common Moving Mistakes That Hurt Performance
- Leaving the blade fully tensioned during transport
- Dragging the saw across the floor instead of using a proper dolly
- Tilting or laying the saw on its side without removing the blade first
- Skipping the table square check after reassembly
- Forgetting to recheck guide and thrust bearing positions
- Assuming a short move across the shop doesn’t need any preparation
- Leaving loose knobs and levers unsecured during transport
- Not inspecting tires for new damage once the saw is back in use
Table Alignment and Its Impact on Accuracy After Reassembly
Checking table alignment should be one of the first things done once a bandsaw reaches its new location, not an afterthought discovered after a few inaccurate cuts. Use a reliable square placed against the blade body, avoiding the teeth, and adjust the table stops until a true ninety degree angle is confirmed. It is also worth checking the miter slots for parallel alignment to the blade, since any fences or jigs used with the saw depend on that relationship staying accurate. Ten minutes spent on this step after a move can prevent hours of wasted material on a project that depends on precise cuts.
Maintenance Tasks That Maximize Bandsaw Lifespan During Storage and Transport
- Rotate wheels periodically during extended storage to prevent tire flat spotting
- Store the blade coiled and protected rather than left loosely tensioned
- Clean pitch and resin from the blade before storing it for any length of time
- Cover the saw if it will sit in a garage, trailer, or unconditioned space
- Inspect blade welds for cracks before the first use after a move
- Check belt tension and condition on belt driven models after reassembly
- Verify all fasteners are tight, especially on guide post assemblies
- Replace worn throat plates promptly rather than waiting for them to fail
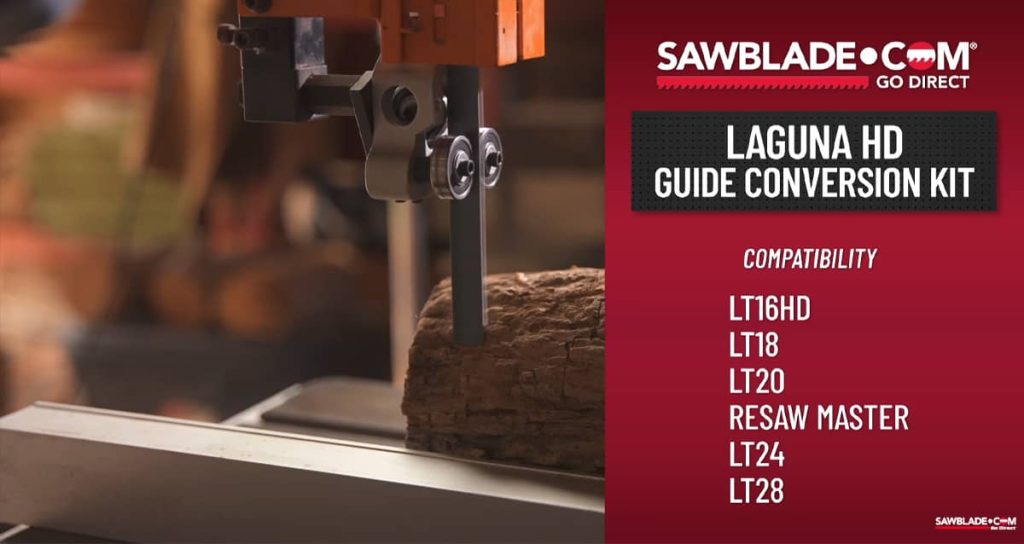
Upgrading Your Guides for Professional Results
A move is also a natural point to evaluate whether the factory guide assemblies are still serving the saw well, since everything is already being recalibrated from scratch. For Laguna LT18 owners, the GuideKits.com LT18 Guide Conversion Kit is worth considering at this stage. It replaces both the upper and lower factory guide assemblies with a precision roller bearing system built around three sealed ball bearings, two stabilizing the blade on each side and one handling thrust. Machined from 6061 aluminum and compatible with blades from 3/8 inch to 3/4 inch wide, it holds its settings reliably through normal use in a way factory blocks often struggle to match. The result is cooler blade operation, reduced friction, and straighter cuts locked in by hardware built specifically to deliver them.
Getting the Most from Every Move
A bandsaw that is properly prepared before a move comes through the process with minimal risk to the precision components that make it cut well. Release tension, protect the wheels and tires, secure the table and guides, and plan the physical move itself with the saw’s weight and balance in mind. Once it arrives, treat reassembly as seriously as the preparation, rechecking tension, tracking, guides, and table alignment before making the first cut. With the right approach, a bandsaw can move across a shop or across the country and still deliver the same accurate, dependable results it had before the move began.