Getting the Most From Your Ridgid 14″ Bandsaw
The Ridgid 14″ bandsaw has earned a solid reputation among woodworkers who want reliable performance without breaking the bank. However, like most mid-range machinery, it benefits significantly from proper setup and thoughtful upgrades that maximize its cutting potential. Whether you just unboxed your BS 14000, BS 14001, or BS 14002, or you have been running one for years, this guide walks you through the essential steps to transform your stock machine into a precision cutting tool. From initial assembly adjustments to aftermarket guide upgrades, the right approach to your Ridgid 14″ bandsaw setup can mean the difference between frustrating cuts and professional results.
Essential Tools for Ridgid 14″ Bandsaw Setup
Before starting any work on your bandsaw, gathering the right tools saves time and frustration. Here is what you need on hand for a complete Ridgid 14″ bandsaw setup:
- Combination square for checking blade alignment and table squareness
- Quality straightedge at least 18 inches long
- Allen wrench set in both metric and standard sizes
- Adjustable wrench for tensioning hardware
- Digital caliper for measuring blade width and guide spacing
- Small flashlight for inspecting internal components
- Clean shop rags for removing factory grease
- White lithograph grease for bearing surfaces
- Wax or dry lubricant for the table surface
- Magnetic angle finder for precise table adjustments
Understanding Factory Settings and Common Issues
Most Ridgid 14″ bandsaws arrive from the factory with settings that work adequately but rarely perform optimally. The blade guides are typically set with excessive clearance, the thrust bearings may not contact the blade back evenly, and table alignment often needs attention. These issues stem from mass production tolerances rather than design flaws, meaning most problems are correctable with patient adjustment. The stock guide system, while functional, uses ceramic or steel blocks that generate more friction than necessary and wear relatively quickly under regular use. Recognizing these baseline limitations helps you understand exactly what upgrades will address and why choosing the right saw blade matters just as much as perfecting your machine setup.
Step by Step Initial Assembly Adjustments
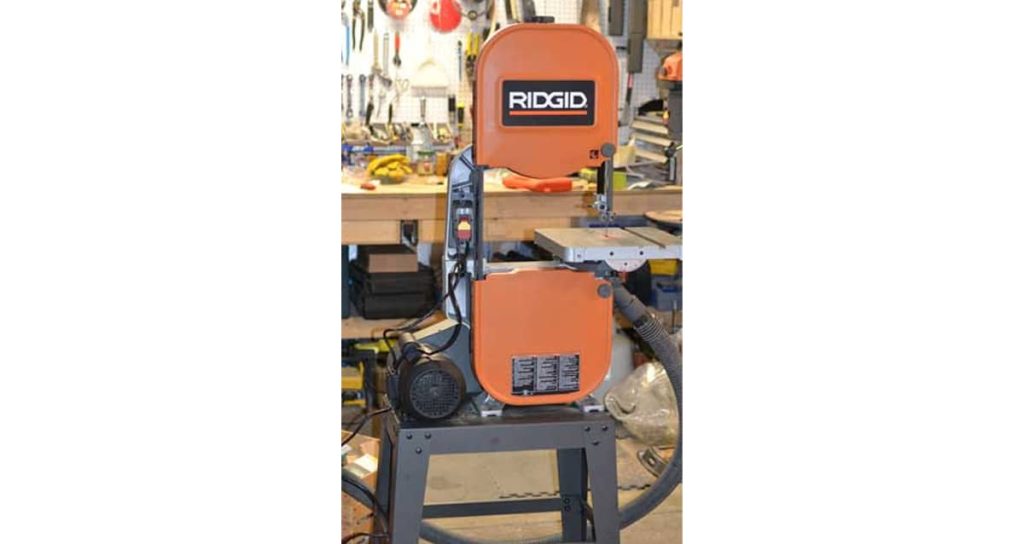
After unpacking your Ridgid 14″ bandsaw, resist the urge to plug it in and start cutting immediately. First, check every bolt and fastener since shipping vibration often loosens hardware during transit. Verify the blade wheels are parallel by holding a straightedge across both tires and confirming no gaps appear. Next, adjust blade tracking so the blade rides in the center of the upper wheel tire, using the tracking knob behind the upper wheel housing. Set proper blade tension according to the scale on your tensioning mechanism, though many experienced users prefer slightly higher tension for resawing tasks. Finally, square your table to the blade using a combination square, making micro adjustments with the trunnion bolts until the blade sits perfectly perpendicular to the table surface.
Ridgid 14″ Bandsaw Guide Upgrade Specifications
| Feature | Stock Guides | Premium Ball Bearing Upgrade Kit |
| Guide Type | Ceramic or steel blocks | Sealed ball bearing rollers |
| Compatible Blade Widths | 1/8″ to 3/4″ | 3/16″ to 1″ |
| Friction Level | Moderate to high | Minimal |
| Expected Lifespan | 6 to 12 months typical use | 3 to 5 years typical use |
| Adjustment Precision | Standard | High precision micro adjustment |
| Installation Difficulty | Factory installed | 30 to 45 minutes for both guides |
| Price Point | Included with saw | $175.96 |
| Compatible Models | BS 14000, BS 14001, BS 14002 | BS 14000, BS 14001, BS 14002 |
Why Blade Guides Make Such a Difference
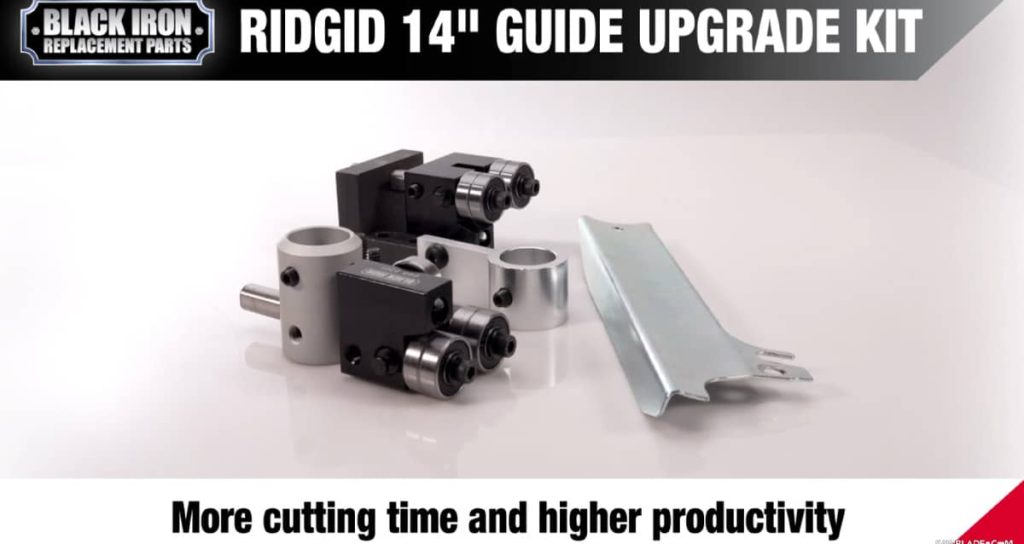
The blade guide system on any bandsaw directly affects cut quality, blade longevity, and the types of cuts you can confidently attempt. Stock guides create friction that generates heat, dulls teeth faster, and allows blade deflection during demanding cuts like resawing thick hardwoods. Premium sealed ball bearing roller guides eliminate most of this friction by allowing the blade to spin the bearings rather than drag against stationary blocks. This seemingly simple change translates to cleaner cut surfaces, longer intervals between blade changes, and noticeably less drift when cutting through dense materials. For anyone using their Ridgid 14″ bandsaw regularly, upgrading the guide system delivers one of the best returns on investment available for this machine class.
Installing Ball Bearing Guide Upgrades
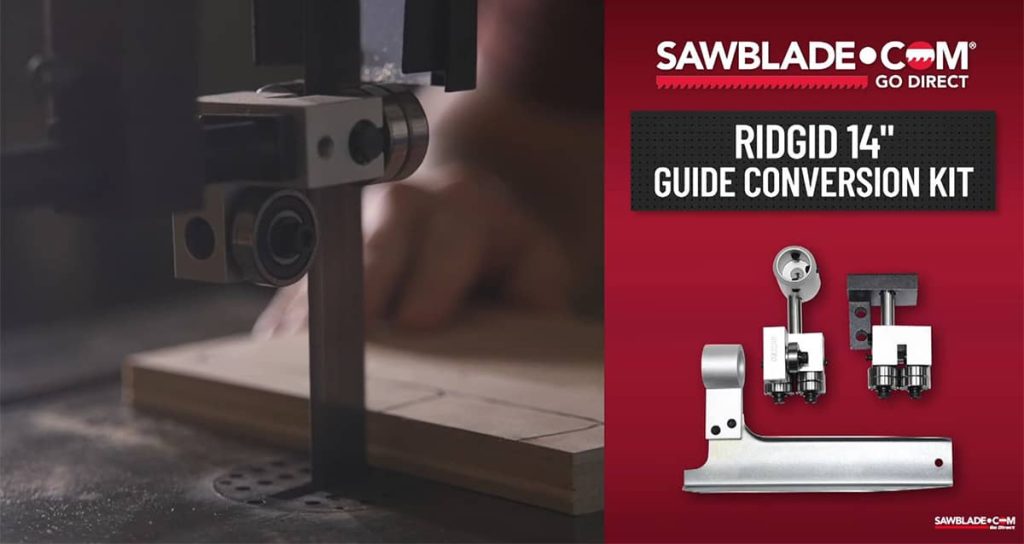
Replacing your stock guides with a precision ball bearing upgrade kit is straightforward with proper preparation. Follow these steps for a successful Ridgid 14″ bandsaw upgrade:
- Unplug the saw and remove the existing blade completely
- Photograph your current guide positions for reference
- Remove the upper guide assembly by loosening the mounting bolts
- Remove the lower guide assembly accessed through the table opening
- Clean all mounting surfaces with a degreaser to remove old lubricant
- Install the new upper guide bracket according to included instructions
- Mount the ball bearing rollers in their carriers with proper spacing
- Install the lower guide assembly following the same procedure
- Reinstall your blade and adjust tension appropriately
- Set guide roller clearance to approximately 0.003 inches from blade sides
Blade Selection After Upgrading Your Guides
Once you install premium ball bearing guides on your Ridgid 14″ bandsaw, your blade options expand considerably. The improved stability allows you to run wider blades with more tension, opening up serious resawing capability that stock guides struggle to support. A 3/4″ or 1″ blade with 2 to 3 teeth per inch becomes practical for slicing through thick stock, while narrower 1/4″ blades still handle curves beautifully with the enhanced support. Consider keeping several blade types on hand, including a general purpose 1/2″ blade with 4 TPI for everyday work, a wide resaw blade, and a narrow blade for tight radius cuts. Quality bandsaw blade options matched to your specific cutting tasks will maximize the benefits of your guide upgrade investment.
ALSO WORTH READING
Cutting Maple? You Might Want to Read This
If you’re working with maple regularly, you’ve probably wondered whether upgrading to carbide bandsaw blades makes sense for your shop. We put together a detailed look at how carbide performs on maple compared to standard blades, including when the investment pays off and when it’s simply unnecessary. Check out “Carbide Bandsaw Blades for Maple: Worth It or Overkill?” for the full breakdown.
Fine Tuning for Optimal Performance
After completing your Ridgid 14″ bandsaw upgrade, these adjustments ensure peak performance:
- Recheck blade tracking with new guides installed as positioning may shift slightly
- Adjust thrust bearings so they sit 0.003 inches behind the blade back when idling
- Verify side guide rollers contact the blade only during cutting pressure
- Test table squareness again since adjustments may have affected alignment
- Run the saw empty for two minutes listening for unusual sounds
- Make a test cut in scrap hardwood checking for drift or vibration
- Mark your optimal guide positions with a paint pen for future reference
- Document your blade tension settings for each blade width you use
Maintenance Schedule for Upgraded Ridgid 14″ Bandsaws
Regular maintenance keeps your upgraded Ridgid 14″ bandsaw performing at its best for years. Check blade tension before each use session since temperature changes and sitting idle can affect tension settings. Inspect your ball bearing guides monthly for smooth rotation by spinning each roller by hand and feeling for roughness or resistance. Clean sawdust accumulation from the guide assemblies weekly if you use the saw frequently, paying special attention to the lower guides where debris collects more readily. Lubricate the blade tension mechanism and any exposed threads every three months with a light machine oil. Replace the rubber tires on both wheels when they show cracks, glazing, or uneven wear, typically every two to four years depending on usage. Keeping your saw blade properly maintained extends cutting life significantly.
Common Setup Mistakes to Avoid
Even experienced woodworkers sometimes overlook details that compromise their Ridgid 14″ bandsaw performance. Here are mistakes to watch for during setup and upgrades:
- Over tensioning blades which causes premature fatigue and breakage
- Setting guides too tight against the blade creating friction and heat
- Ignoring lower guide adjustments while focusing only on upper guides
- Forgetting to check thrust bearing alignment after installing new guides
- Using dull blades which makes even perfect setup seem inadequate
- Skipping the fence alignment step after table adjustments
- Neglecting to clean factory shipping grease before initial use
- Adjusting tracking while the saw is running without proper safety precautions
Taking Your Ridgid 14″ Bandsaw to the Next Level
A properly set up and upgraded Ridgid 14″ bandsaw transforms from a capable hobby machine into a serious production tool. The combination of careful initial assembly, precise adjustments, and quality ball bearing guide upgrades addresses the limitations of stock configuration while preserving the fundamental value this saw offers. Your investment in a $175.96 guide upgrade kit pays dividends through cleaner cuts, longer blade life, reduced material waste, and faster work completion. Whether you primarily resaw lumber, cut curves in furniture components, or handle general shop duties, taking time to optimize your Ridgid 14″ bandsaw setup rewards you with years of reliable, accurate cutting performance that rivals machines costing considerably more.