Why Your Vintage Bandsaw Deserves a Second Life
That old bandsaw sitting in your shop likely has more potential than you realize. Many woodworkers and fabricators inherit or purchase vintage bandsaws from estate sales, retiring craftsmen, or dusty corners of industrial auctions, only to discover these machines were built with casting quality and motor durability that modern budget models simply cannot match. The secret that experienced makers like Jordan Goetz of Growler Domestics in Austin, Texas have discovered is straightforward: upgrading an old bandsaw with modern components often delivers better results than buying a new mid-range machine at twice the cost. Goetz, who grew his custom fabrication studio from a small garage operation into one of Texas’s leading shops, attributes much of his early success to learning how to maximize older equipment through strategic upgrades rather than expensive replacements.
Essential Components to Evaluate Before Starting Your Bandsaw Upgrade
When planning an old bandsaw upgrade, you need to assess the current condition of several key components to determine which investments will give you the best return.
- Inspect the wheel bearings by spinning each wheel and listening for grinding, clicking, or rough spots
- Check the frame and table casting for cracks, particularly around weld points and mounting areas
- Examine the tire condition on both wheels for hardening, cracking, or uneven wear patterns
- Test the blade guides for excessive play or missing components
- Evaluate the motor for overheating, unusual sounds, or inconsistent speed
- Measure table flatness with a straightedge to identify warping
- Assess the fence system for rigidity and alignment capability
- Look at the blade tension mechanism for smooth operation and adequate pressure range
Understanding What Makes Vintage Bandsaws Worth Upgrading
The primary reason vintage bandsaws respond so well to upgrades comes down to their original construction philosophy. Manufacturers in the 1960s through 1980s used heavier castings, thicker steel components, and overbuilt motors because material costs represented a smaller percentage of the final price compared to labor. A 14-inch bandsaw from 1975 might weigh 50 to 75 pounds more than its modern equivalent, and that extra mass translates directly to vibration dampening and cut stability. The frames on these older machines were often cast in single pieces rather than assembled from stamped steel panels, giving them inherent rigidity that even careful welding cannot replicate. When you upgrade an old bandsaw with quality modern guides and a fresh blade, you are essentially combining yesterday’s robust foundation with today’s precision components.
The Blade Factor: Why Your First Upgrade Should Always Be the Blade
No single upgrade will transform your old bandsaw’s performance more dramatically than installing a quality blade matched to your typical cutting tasks. Many owners run their vintage machines with whatever blade came installed, not realizing that blade technology has advanced significantly over the past two decades. Modern bi-metal and carbide-tipped blades hold their edge longer, run cooler, and produce smoother cuts than the carbon steel blades that were standard when most vintage bandsaws were manufactured. For general woodworking, a 3 TPI or 4 TPI blade with a hook tooth pattern will handle resawing and curves equally well. Metal-cutting bandsaws benefit from variable pitch blades that reduce vibration and extend blade life. The key is matching blade width to your machine’s wheel diameter, with most 14-inch bandsaws performing optimally with blades between 1/4 inch and 3/4 inch wide.
Bandsaw Upgrade Cost Comparison
| Upgrade Component | Budget Option Cost | Premium Option Cost | Expected Performance Gain |
| Blade Guides (upper and lower) | $45 to $80 | $120 to $200 | 30 to 40 percent improvement in cut accuracy |
| Urethane Wheel Tires | $25 to $40 | $50 to $75 | Reduced vibration and better blade tracking |
| Aftermarket Fence System | $60 to $100 | $150 to $250 | Consistent parallel cuts and easier adjustment |
| Replacement Bearings | $15 to $30 | $40 to $60 | Smoother wheel rotation and reduced noise |
| LED Work Light | $20 to $35 | $50 to $80 | Improved visibility at cut line |
| Mobile Base | $40 to $70 | $100 to $150 | Shop flexibility and floor space optimization |
| Dust Collection Port | $15 to $25 | $35 to $60 | Cleaner cuts and healthier shop environment |
Upgrading Your Blade Guides for Precision Cutting
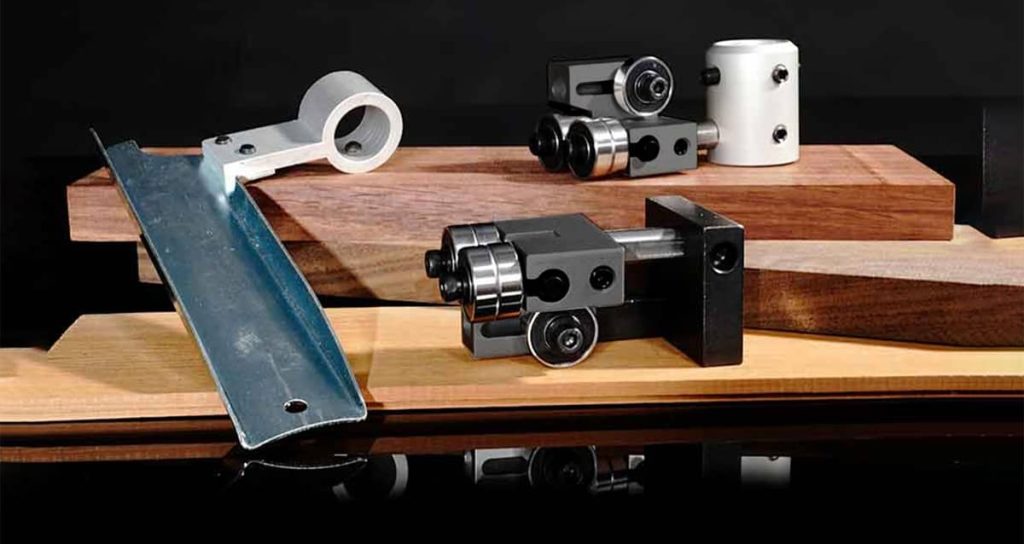
The blade guides on most vintage bandsaws consist of simple steel blocks or small bearing assemblies that allow significant blade deflection under cutting pressure. Replacing these with modern ceramic or ball-bearing guide systems ranks among the most cost-effective upgrades you can make when working to modernize an old bandsaw. Quality aftermarket guides support the blade on both sides and behind the back edge, keeping it tracking straight even when pushing thick hardwood through aggressive cuts. Installation typically requires only basic hand tools and takes about an hour for both upper and lower guide assemblies. The difference becomes immediately apparent when resawing, where blade wander can turn a 6-inch board into unusable wedge-shaped pieces. With proper guides installed and adjusted correctly, even a 50-year-old bandsaw can produce book-matched panels with minimal post-cut planing required.
Step-by-Step Wheel Tire Replacement Process
Worn or hardened wheel tires cause tracking problems, vibration, and premature blade wear that no amount of adjustment can fully correct.
- Remove the blade and set it aside in a coiled position to prevent kinking
- Take detailed photos of your current tracking and tension settings for reference
- Remove any guards or covers blocking access to the wheels
- Pry off the old tires carefully using a flat screwdriver, working around the circumference gradually
- Clean the wheel surface thoroughly with mineral spirits to remove old adhesive and debris
- Measure the wheel diameter and order urethane replacement tires sized 1/8 inch smaller for proper stretch fit
- Heat the new tires in warm water for 10 to 15 minutes to increase flexibility
- Stretch the softened tire over the wheel rim, working opposite sides alternately
- Allow 24 hours for the tire to cool and set before reinstalling the blade
- Retrack the blade and verify smooth operation at low speed before resuming normal use
Motor Considerations for Your Bandsaw Upgrade Project
The motor on your vintage bandsaw may be the one component that actually outperforms its modern equivalents, but it still deserves attention during any serious upgrade project. Older induction motors were built with copper windings and quality bearings that often run cooler and last longer than the aluminum-wound motors found in many current consumer machines. Before assuming your motor needs replacement, check the capacitor on single-phase models, as this inexpensive component frequently fails and causes starting problems or reduced power. Clean the motor housing vents and ensure adequate airflow, since decades of sawdust accumulation can cause overheating that mimics motor failure. If your motor does need replacement, consider upgrading to a slightly higher horsepower unit, as most vintage bandsaw frames were designed with overhead capacity that modern motors can utilize. A 3/4 HP bandsaw frame can typically accept a 1 HP motor without modification, giving you noticeably faster cutting in dense materials.
ALSO WORTH READING
Expand Your Bandsaw’s Potential
If you’re looking to cut thicker stock on your bandsaw, a riser block might be exactly what you need. This simple upgrade can significantly increase your resaw capacity without requiring a whole new machine. We put together a guide explaining how riser blocks work and what to consider before installing one. Check out “How a Bandsaw Riser Block Improves Resaw Capacity” to learn more.
Common Mistakes to Avoid When Upgrading an Old Bandsaw
Even experienced woodworkers make errors that undermine their bandsaw upgrade investments and lead to frustration with machines that should perform beautifully.
- Installing new tires without cleaning the wheel surfaces first, causing adhesion failure within months
- Over-tensioning blades in an attempt to reduce drift, which actually accelerates blade fatigue and bearing wear
- Setting guides too close to the blade teeth, which causes premature dulling and heat buildup
- Ignoring table alignment during other upgrades, resulting in cuts that are not perpendicular to the blade
- Choosing blade width based only on curve-cutting ability without considering resawing needs
- Skipping thrust bearing adjustment after installing new guides
- Failing to balance wheels after tire replacement, which introduces vibration
- Using automotive grease on bearings instead of proper lightweight machine lubricants
Tuning Your Upgraded Bandsaw for Optimal Results
After completing your component upgrades, the tuning process determines whether your old bandsaw actually delivers the modern performance you invested in achieving. Start with the wheels, ensuring both are perfectly coplanar by placing a straightedge across their faces and checking for gaps. Next, adjust blade tension using the scale on your machine as a starting point, then fine-tune based on blade deflection. You should be able to push the blade sideways about 1/4 inch with moderate finger pressure when properly tensioned for most cutting tasks. Set your guides approximately 1/64 inch away from the blade sides, close enough to provide support without creating friction. The thrust bearings should sit just behind the blade back, making contact only when cutting pressure pushes the blade rearward. Finally, align your fence parallel to the miter slot using a dial indicator or precise measuring from multiple points, as even small misalignment causes binding and burn marks on resawn boards.
Give Your Old Bandsaw a New Lease on Life with Better Guides
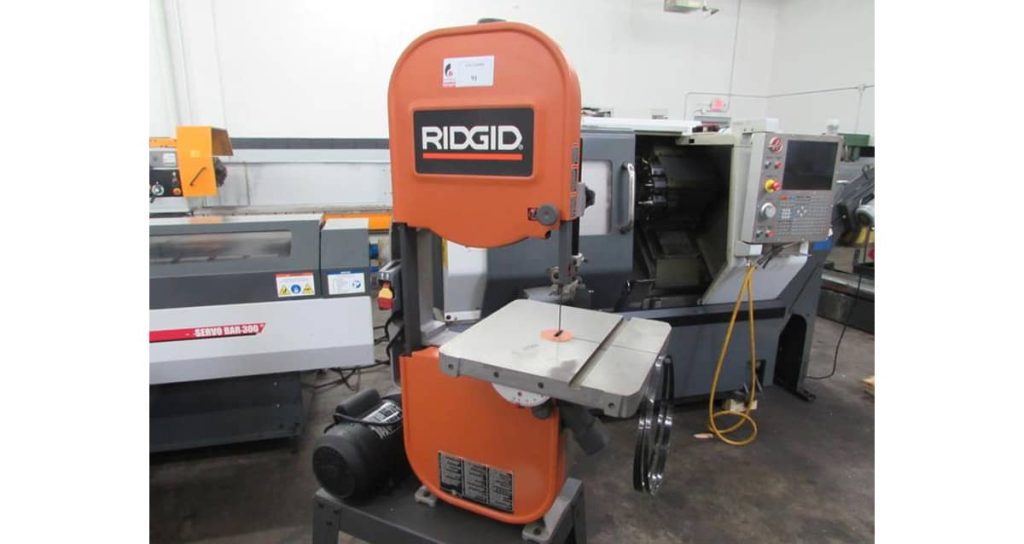
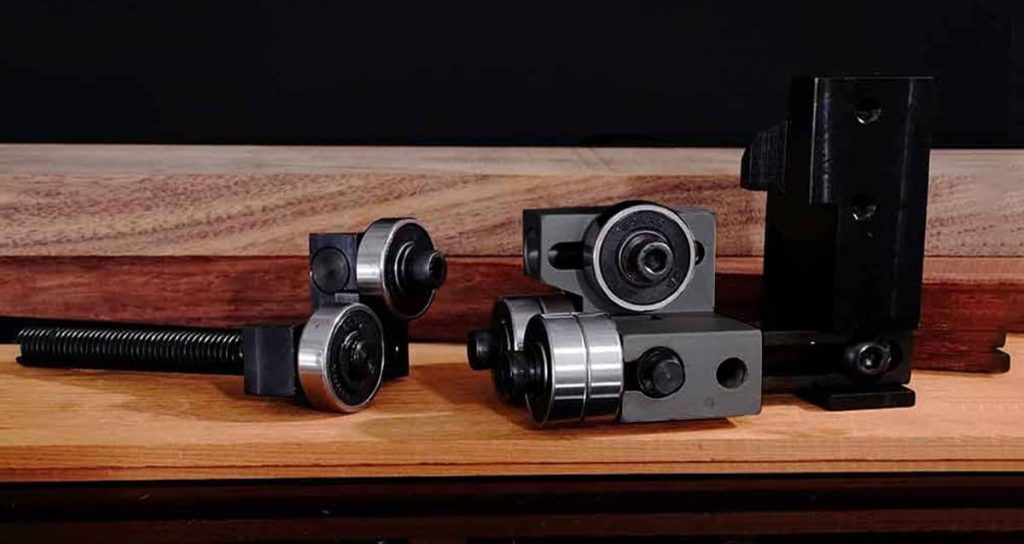
Stock guides on older bandsaws tend to wear unevenly over the years, leading to blade drift, chatter, and shortened blade life. Swapping them out for a precision Black Iron guide kit addresses that problem directly. Kits built for the Sears Craftsman 12″, Grizzly 14″, and Ridgid 14″ all promise improved accuracy, better blade stability, and increased durability compared to the original hardware. Because they are designed to be compatible with both factory guides and Carter-style systems, the upgrade installs easily without requiring a full guide assembly overhaul. For woodworkers running a decades-old machine, this single modification often delivers a noticeable jump in cut quality and blade longevity.
Signs Your Bandsaw Upgrade Was Successful
After investing time and money into modernizing your vintage machine, these indicators confirm that your old bandsaw upgrade delivered meaningful improvements.
- Blade tracks consistently without wandering toward either edge of the tires
- Motor maintains speed under load without bogging down or overheating
- Cut surfaces require minimal sanding or planing before glue-up
- Resawn boards measure consistently from end to end and edge to edge
- Vibration has decreased noticeably, with the machine running smoothly at full speed
- You can cut curves without the blade binding or producing burned edges
- The fence holds its setting throughout long ripping operations
- Blade life has increased compared to before the upgrades
- Dust collection captures material effectively without buildup around the lower wheel
Making Your Upgraded Bandsaw Last Another Generation
The work you put into upgrading your old bandsaw represents an investment worth protecting through proper maintenance and operational habits. Clean the table surface and guides after each session to prevent sawdust from hardening into abrasive deposits that scratch workpieces and wear components. Check blade tension before starting and release tension when the machine will sit unused for more than a few days, as constant stress accelerates blade fatigue and stretches spring mechanisms. Lubricate moving parts according to a seasonal schedule, paying particular attention to the blade guide bearings and adjustment threads that can seize from neglect. Store spare blades properly in hanging loops or dedicated blade storage containers rather than coiled tightly in drawers where they can develop stress fractures. With consistent care, the bandsaw you upgraded today can serve your shop for decades more, potentially outlasting equipment purchased new at several times the cost.
Your Vintage Bandsaw’s Best Years Are Still Ahead
Upgrading an old bandsaw connects you to a practical tradition that values quality construction and thoughtful improvement over disposable consumption. The approach that makers like Jordan Goetz have used successfully, starting with solid vintage equipment and enhancing it strategically, puts professional-grade capability within reach of any shop budget. Your upgraded bandsaw now combines the mass, rigidity, and build quality of an earlier manufacturing era with guides, blades, and accessories that simply did not exist when the machine was new. Every smooth resaw cut and precise curve you produce validates the decision to restore rather than replace. That old bandsaw has earned its place in your shop, and with the upgrades you have made, it is ready to deliver performance that rivals machines costing far more.