Understanding the Foundation of Reliable Bandsaw Performance
Setting bandsaw guides correctly is one of those skills that separates frustrating workshop sessions from productive ones. When your blade tracks smoothly, everything else falls into place: cuts stay straight, blades last longer, and you spend less time fighting your equipment. The challenge is that most woodworkers learn guide adjustment through trial and error, often missing the underlying principles that make the difference between a bandsaw that drifts and one that cuts true. Whether you are installing a new guide system or fine-tuning your existing setup, understanding how to set bandsaw guides properly will transform your experience at this essential machine.
Signs Your Bandsaw Guides Need Adjustment
- The blade wanders off your marked line during cuts, requiring constant steering
- You notice uneven wear patterns on your blade teeth
- The blade produces a clicking or rubbing sound during operation
- Cuts show inconsistent kerf width from start to finish
- The blade tends to twist or deflect when cutting thick stock
- You see visible gaps or contact between guide bearings and the blade body
- Sawdust accumulates unevenly around the guide assembly
- Resawing produces a curved surface instead of a flat one
What Centerline Alignment Really Means for Your Bandsaw
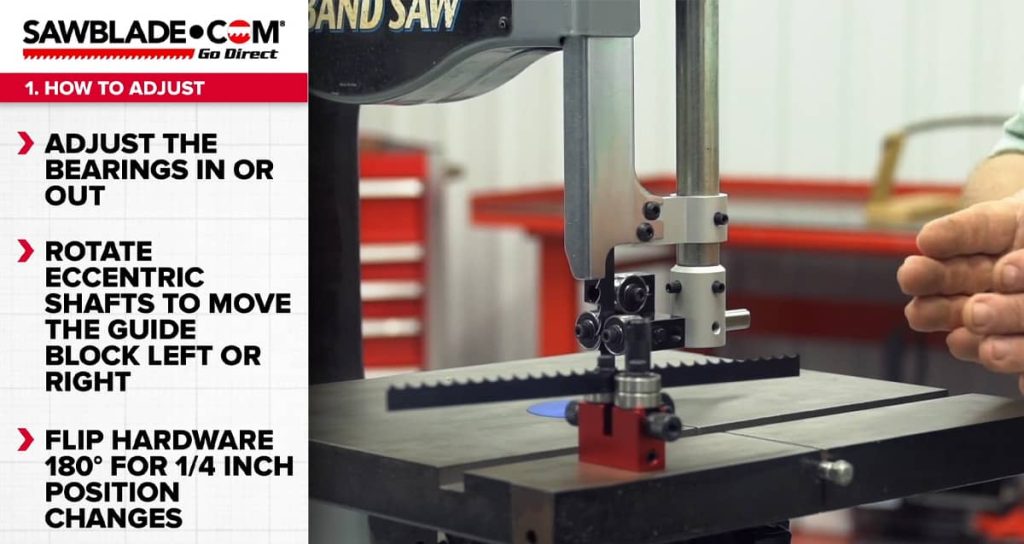
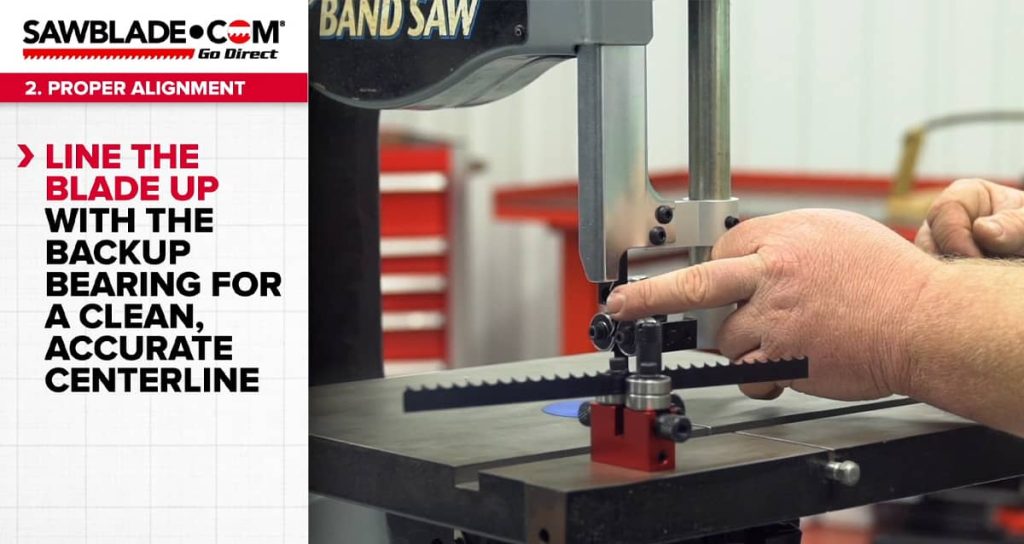
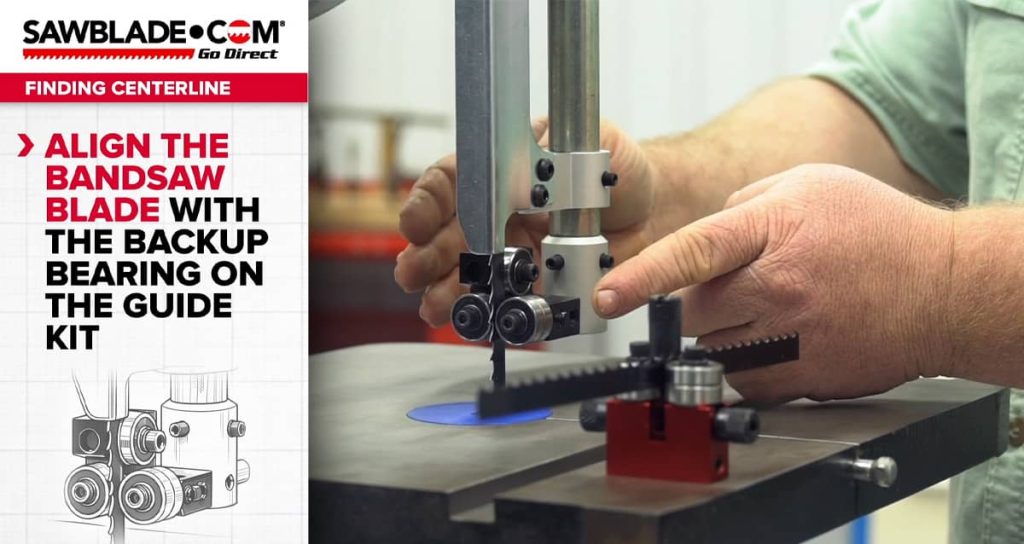
The centerline is the sweet spot where your blade sits properly aligned with the guide system’s backup bearing. Think of it as the home position for your blade, the reference point that everything else gets adjusted around. When the blade runs along this centerline, the guide bearings can do their job of supporting lateral movement without causing unnecessary friction or deflection. Getting this alignment right before adjusting anything else saves time and prevents the common mistake of chasing multiple adjustments that work against each other. Many experienced woodworkers check centerline alignment first whenever blade tracking seems off.
Why Proper Guide Settings Affect More Than Just Tracking
Blade tracking issues tend to get all the attention, but the consequences of poorly set guides extend much further. When guides are misaligned, your blade flexes in ways it was never designed to handle, creating stress points that lead to fatigue cracks and premature failure. That expensive bandsaw blade you invested in might last half as long as it should simply because the guides were putting uneven pressure on the blade body. Beyond blade life, poor guide settings affect cut quality in subtle ways that are easy to overlook, including increased surface roughness and the kind of gradual drift that makes jointing edges nearly impossible.
Guide Clearance Reference Chart
| Component | Recommended Clearance | Test Method | Common Mistake |
| Side guide bearings | 0.003 to 0.005 inches | Business card thickness | Bearings touching blade constantly |
| Thrust bearing | 0.015 to 0.020 inches | Paper folded twice | Bearing too far back, no support |
| Upper guide height | 1/4 inch above workpiece | Visual check before each cut | Leaving guides too high during cuts |
| Lower guide position | Fixed per manufacturer | Factory specification | Adjusting when upper guide is sufficient |
| Blade tension | Per blade width chart | Tension gauge or flutter test | Over-tensioning narrow blades |
The Business Card Method for Setting Bearing Clearance
One of the most reliable techniques for setting guide bearing clearance uses a tool you probably have in your wallet right now. A standard business card measures approximately 0.012 inches thick, making it perfect for establishing the small gap needed between your side guide bearings and the blade. Slide the card between the bearing and blade, then adjust the bearing inward until you feel light resistance when moving the card. Remove the card, and your bearing should be close enough to provide support during cutting without making constant contact. This simple method works because the goal is to keep bearings ready to catch blade deflection without creating drag during normal operation.
Step by Step Guide Adjustment Sequence
- Start by releasing blade tension completely and checking the blade for damage or fatigue
- Clean all guide components thoroughly, removing sawdust and pitch buildup
- Reinstall the blade and bring it up to proper tension for its width
- Adjust the tracking so the blade runs centered on the wheels
- Position the thrust bearing behind the blade with a folded paper gap
- Move side guide bearings in using the business card method on each side
- Lower the upper guide assembly to working height
- Run the saw briefly without cutting to verify bearing behavior
- Make fine adjustments using eccentric mounting hardware if your guides include this feature
- Test with a scrap cut and observe tracking through the entire pass
Understanding Eccentric Mounting Hardware
Some guide systems include eccentric mounting hardware that allows incredibly precise adjustments without the frustration of standard lock and slide mechanisms. These eccentric mounts work by rotating a slightly off-center shaft, which moves the bearing position in tiny increments. The advantage becomes clear when you need to dial in alignment within a few thousandths of an inch, something that is nearly impossible with conventional adjustment screws. If your guide system uses eccentric hardware, spend time learning how rotation direction corresponds to bearing movement. A quarter turn might be all you need to go from a blade that wanders to one that tracks perfectly.
ALSO WORTH READING
Finding the Right Bandsaw Guide for Your Machine
If you’re considering upgrading your bandsaw guides, compatibility is one of the most important factors to get right. Not all guide systems work with every bandsaw, and choosing the wrong kit can lead to frustration and wasted money. Our article on bandsaw guide upgrade kit compatibility walks you through how to measure your saw, check specifications, and match guides to your specific machine. It’s worth a read before you make any purchasing decisions.
Common Guide Adjustment Mistakes to Avoid
- Setting guide bearings too tight against the blade, causing constant friction and heat buildup
- Forgetting to recheck adjustments after changing to a different blade width
- Ignoring worn or damaged bearings that no longer spin freely
- Adjusting guides with the blade under tension, which changes position once released
- Skipping the thrust bearing and focusing only on side guides
- Using damaged blades as a reference, which will never track correctly regardless of guide settings
- Failing to clean pitch and resin from guide surfaces before making adjustments
- Making multiple adjustments simultaneously instead of isolating one variable at a time
How Guide Settings Change With Different Blade Types
Switching between blade widths and tooth configurations means your guide settings need to change too. A 1/2 inch blade requires different bearing positions than a 1/4 inch blade, and the clearances that worked perfectly for resawing will be wrong for tight curve cutting. Wider blades generally tolerate slightly tighter guide settings because they resist deflection better, while narrow blades need a bit more clearance to prevent binding during turns. The thrust bearing position becomes especially important with narrow blades since they depend more heavily on back support to prevent twisting. Make it a habit to verify guide positions whenever you swap blades, even if the new blade is the same width as the previous one.
Maintenance Practices That Preserve Guide Accuracy
- Inspect guide bearings monthly for smooth rotation and replace any that feel rough or gritty
- Clean guide assemblies with a stiff brush after every major project
- Check mounting bolts for looseness that could allow components to shift during use
- Apply dry lubricant to adjustment threads to keep them moving freely
- Verify blade tension periodically since stretching changes how the blade sits relative to guides
- Document your settings for commonly used blade sizes to speed up future changes
- Replace worn guide posts or brackets before they affect bearing alignment
- Keep spare bearings on hand so worn ones can be swapped immediately
Bringing It All Together for Reliable Results
Setting bandsaw guides accurately is not complicated once you understand the relationships between components and take a systematic approach to adjustment. The centerline serves as your reference point, the business card method gives you a reliable way to set clearances, and checking your work with test cuts confirms everything is dialed in. What makes the real difference is treating guide adjustment as part of regular maintenance rather than something you only address when problems become obvious. A few minutes spent verifying guide positions before a project pays off in cleaner cuts, longer blade life, and the satisfaction of a machine that performs the way it should. Your bandsaw has the potential to be one of the most versatile tools in your shop, and properly set guides unlock that potential every time you turn it on.