Why Proper Guide Alignment Matters for Every Cut You Make
If you have ever watched a bandsaw blade drift off its intended path, you already understand the frustration of misaligned guides. Blade guides serve one fundamental purpose: keeping the blade stable and tracking true so every cut comes out square. When guides fall out of alignment, even the best blade and optimal settings cannot compensate for the resulting wander. The cut drifts, material gets wasted, and you end up spending time correcting problems that proper guide alignment would have prevented in the first place. Understanding guide alignment basics is not complicated, but it does require attention to detail and regular maintenance checks to keep your saw performing at its best.
Common Signs Your Blade Guides Need Attention
Blade guides rarely fail all at once. Instead, they show gradual signs of wear that affect cut quality over time. Watch for these indicators:
- Cuts that consistently drift to one side despite correct blade tension
- Visible scoring or groove marks on the guide surfaces
- Unusual blade vibration during cutting operations
- Increased noise levels when the blade is running under load
- Burn marks or discoloration on cut surfaces
- The blade twisting or deflecting when entering harder materials
- Uneven wear patterns on the blade itself
What Blade Guides Actually Do During a Cut
Blade guides work as a team to hold the blade in a precise vertical plane while allowing it to move freely in the cutting direction. Most bandsaw setups use a combination of side guides and a backup bearing or guide positioned behind the blade. The side guides prevent lateral movement that causes the blade to wander left or right during a cut. The backup guide or bearing supports the blade against the forward pressure generated when material pushes back during cutting. When all three contact points are properly aligned, the blade stays locked in position and tracks straight through the workpiece without deflection.
How Worn Guides Affect Cut Quality and Blade Life
Guide wear creates a chain reaction of problems that extends well beyond crooked cuts. When side guides develop grooves or lose their original surface flatness, they allow the blade to shift sideways under cutting pressure. This lateral movement forces the blade teeth to work at an angle rather than straight into the material, which accelerates tooth wear and generates excess heat. The blade also experiences stress fatigue from the constant sideways flexing, which shortens its useful life significantly. On harder materials where cutting forces are higher, worn guides make accurate straight cuts nearly impossible and can even lead to blade breakage if the deflection becomes severe enough.
Guide Alignment Basics at a Glance
| Alignment Factor | What to Check | Why It Matters |
| Side guide position | Gap between guide and blade should be minimal but not touching when idle | Prevents lateral drift while allowing blade to run freely |
| Backup guide clearance | Should sit just behind blade gullets without contacting teeth | Supports blade against cutting pressure without causing damage |
| Guide height adjustment | Guides positioned close to workpiece with minimal blade exposure | Reduces unsupported blade length for straighter cuts |
| Guide surface condition | No visible grooves, scoring, or uneven wear patterns | Worn surfaces allow blade movement and inconsistent tracking |
| Guide parallelism | Both side guides equally spaced from blade centerline | Uneven spacing causes blade to favor one side |
| Indicator alignment | Check that guide indicators are not bent or twisted | Ensures accurate readings when making adjustments |
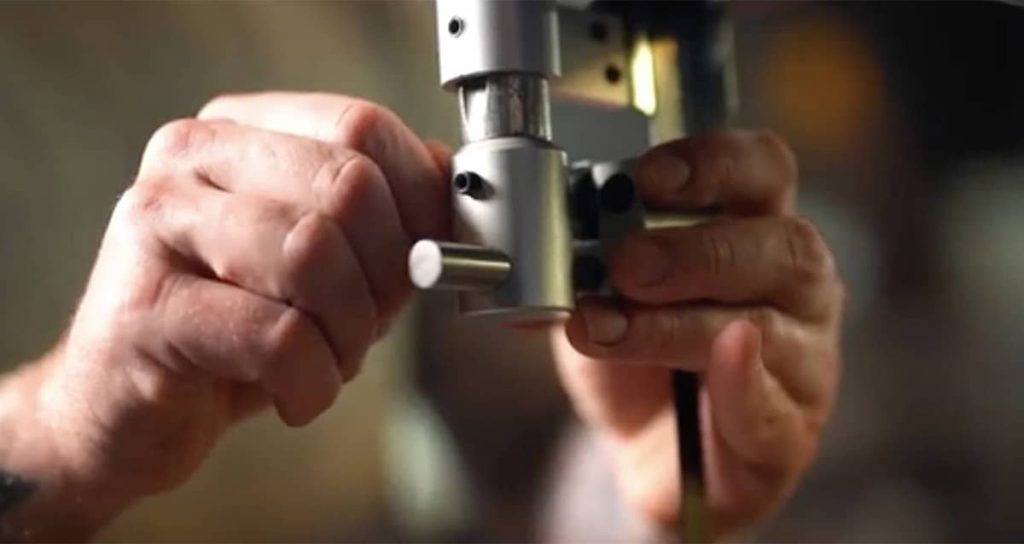
Setting Up Side Guides for Optimal Blade Support
Side guides require precise positioning to support the blade without creating drag or heat buildup. The standard approach is to set each side guide so it sits as close to the blade as possible while leaving just enough clearance that the blade does not contact the guides when running idle. A common method involves using a piece of paper or a feeler gauge to set consistent spacing on both sides. The guides should contact the blade body, not the teeth or the weld joint. After setting the gap, run the saw briefly without material and watch for any blade contact with the guides. If you see the blade rubbing consistently on one side, that guide needs adjustment to restore balance.
Steps for Checking Guide Alignment Before Each Shift
Taking a minute to verify guide alignment before starting production prevents problems that waste far more time later. Follow this sequence:
- Power off the machine and wait for all movement to stop completely
- Visually inspect both side guides for obvious wear marks or damage
- Check that guides are positioned close to the blade without direct contact
- Verify the backup guide or bearing sits behind the blade gullets
- Look for any debris buildup between guides and blade surfaces
- Confirm guide mounting hardware is secure and not loosened from vibration
- Run the saw briefly at idle speed and listen for unusual sounds
- Make a test cut on scrap material and check the cut surface for square
When to Reposition Guides Versus Replace Them Entirely
Not every guide problem requires new parts. In many cases, repositioning existing guides restores proper blade support and corrects cutting issues. If guides have developed light surface wear but remain flat overall, adjusting their position to present a fresh contact area often extends their service life. However, guides with deep grooves, visible cracks, or surfaces worn beyond adjustment range need replacement. Running severely worn guides risks blade damage and creates safety concerns. When checking guides, use calipers to measure thickness at multiple points if you are unsure whether enough material remains for repositioning. Guides worn below the manufacturer’s minimum specification should be replaced regardless of how they appear visually.
ALSO WORTH READING
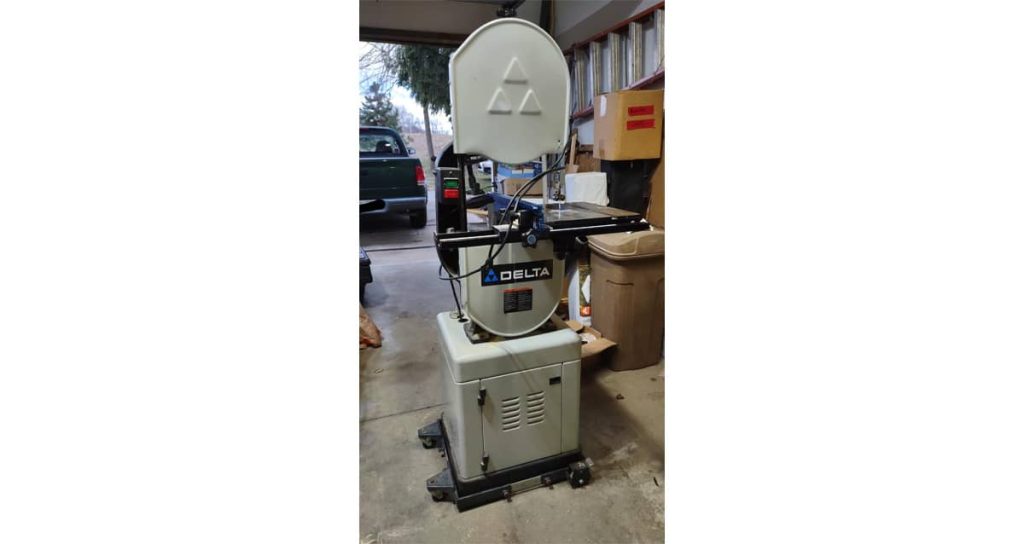
More on Delta Band Saws
If you own a Delta 28-180 or are thinking about picking one up, we have a dedicated guide that covers everything you need to know. It includes details on the manual, the correct blade size, replacement parts, and solutions to the most common issues owners run into. Check out our full Delta 28-180 guide for all the specifics.
Factors Beyond Guides That Affect Cut Straightness
Guide alignment basics represent only one part of the accuracy equation. Before assuming guides are the problem when cuts drift, check these other variables:
- Blade tension set correctly for the blade width being used
- Proper tooth pitch selected for the material thickness
- Feed rate appropriate for the material hardness
- Cutting speed matched to the material type
- Workpiece secured level in the vise
- Vise aligned square to the blade travel path
- Blade condition checked for dull teeth or damage
- Coolant flow adequate to prevent heat buildup
How Often to Inspect Guides on Production Machines
Production environments demand more frequent guide inspections than occasional use situations. On machines running multiple shifts or cutting abrasive materials, checking guides at the start of each shift catches developing problems before they affect part quality. High volume operations cutting stainless steel, tool steel, or other hard alloys should inspect guides even more frequently since these materials generate higher cutting forces that accelerate guide wear. Keep a simple log noting guide condition and any adjustments made, which helps identify wear patterns and predict when replacements will be needed. This approach prevents unexpected downtime from guide failures that could have been anticipated with regular monitoring.
Quick Troubleshooting Guide for Common Alignment Issues
When cuts start drifting despite what appears to be correct guide setup, work through these possibilities systematically:
- Blade installed with teeth pointing in the correct direction
- Blade tension verified with a tension gauge rather than estimated
- Guides cleaned of any metal chips or cutting fluid residue
- Both side guides adjusted equally rather than favoring one side
- Backup guide not positioned too far forward where it contacts teeth
- Wheel alignment checked since misaligned wheels cause tracking problems
- Blade not worn beyond its useful life even if teeth appear intact
- Material properly supported to prevent movement during cutting
Keeping Your Guides Working Right Pays Off Every Day
Accurate straight cuts start with properly aligned blade guides, and maintaining that alignment is one of the simplest ways to improve cut quality and extend blade life. The few minutes spent checking guide condition and position before each use prevents hours of rework, wasted material, and premature blade replacement. Whether you run a horizontal production saw or a vertical machine for custom work, the same guide alignment basics apply. Keep guides clean, position them correctly, replace them when wear exceeds adjustment range, and verify the rest of your setup before blaming guides for cutting problems. If you need replacement guides or have questions about proper setup for your specific machine, the team at Sawblade.com can help you find the right parts and get your saw cutting straight again.