Why a Riser Block Changes Everything for Your 14-Inch Bandsaw
If you have ever tried resawing thick lumber on a standard 14-inch bandsaw, you know the frustration of running out of cutting height right when you need it most. A riser block installation transforms your machine from a capable but limited tool into a serious resawing workhorse. By adding typically four to six inches of resaw capacity, this relatively affordable upgrade opens up possibilities for bookmatching thick stock, slicing your own veneers, and processing logs that previously seemed impossible. The process itself is straightforward for anyone comfortable with basic mechanical work, but there are specific details that separate a successful installation from one that causes problems down the road.
Essential Tools and Materials You Will Need
- Socket wrench set with metric and standard sizes
- Allen key set matching your bandsaw hardware
- Flat head and Phillips screwdrivers
- Needle nose pliers for guide adjustments
- Riser block kit specific to your bandsaw model
- Longer blade appropriate for the new capacity
- Blue threadlocker for reassembly
- Clean rags and degreaser
- Digital caliper for alignment checks
- Straightedge at least 24 inches long
Understanding What a Riser Block Actually Does
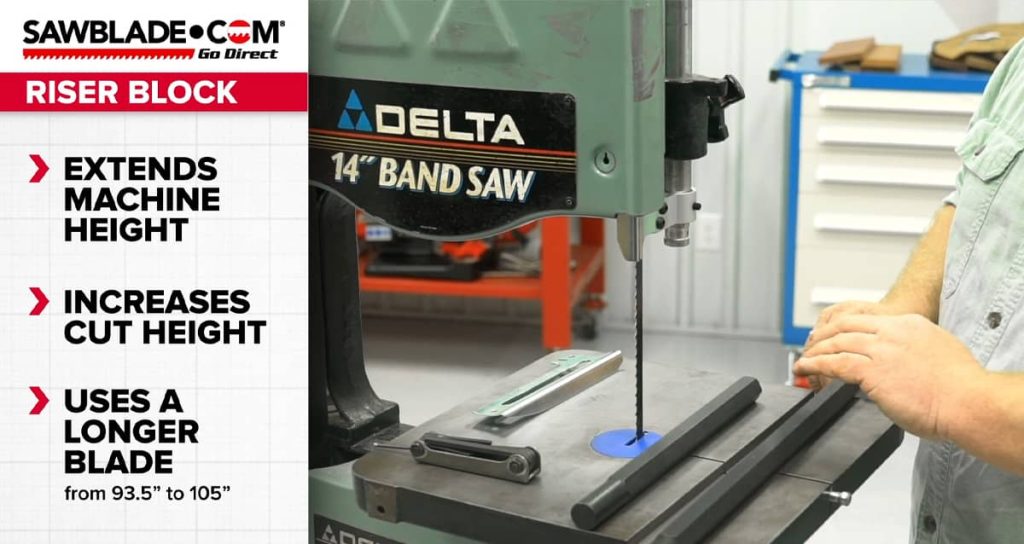
A riser block is essentially a precision machined spacer that fits between the upper and lower sections of your bandsaw frame. When installed correctly, it increases the distance between the table surface and the upper blade guides, which directly translates to greater resaw capacity. On most 14-inch bandsaws, the stock resaw height sits around six inches. Adding a riser block typically bumps this to ten or even twelve inches depending on the kit. This additional height requires a longer blade, usually moving from a 93.5-inch blade to something in the 105 to 111-inch range. The specific measurement depends on your saw model and the riser block dimensions.
Before You Start: Preparation Steps That Matter
Taking time to prepare your workspace and bandsaw properly prevents headaches during installation. Start by unplugging your saw completely and removing the blade. Clean the upper and lower frame surfaces where the riser block will seat, removing any sawdust, rust, or debris that could prevent proper mating. Photograph your current guide positions and tension settings so you can reference them later. Check that your riser block kit includes all listed components, typically the block itself, longer guide post, extended blade guard, and mounting hardware. Having a helper available makes handling the upper frame section much easier, as it can be surprisingly heavy and awkward to manage alone.
Riser Block Specifications for Popular 14-Inch Bandsaw Models
| Bandsaw Model | Added Resaw Height | New Blade Length | Mounting Bolts | Weight of Riser |
| Grizzly G0555 | 6 inches | 105 inches | 4 bolts | 12 pounds |
| Jet JWBS-14CS | 6 inches | 111 inches | 4 bolts | 14 pounds |
| Rikon 10-325 | 6 inches | 105 inches | 4 bolts | 11 pounds |
| Delta 28-400 | 6 inches | 105 inches | 4 bolts | 13 pounds |
| Laguna 14BX | 4 inches | 111 inches | 6 bolts | 15 pounds |
| Powermatic PWBS-14 | 6 inches | 111 inches | 4 bolts | 16 pounds |
Step by Step Riser Block Installation Process
Begin by removing the four bolts that connect the upper frame casting to the lower section of your bandsaw. Most 14-inch models use large hex head bolts accessible from the rear of the machine. With the bolts removed, carefully lift the upper frame section and set it aside on a protected surface. Position the riser block on top of the lower frame, aligning the bolt holes precisely. Lower the upper frame onto the riser block, again aligning all holes carefully. Insert the longer bolts included with your kit, applying a small amount of threadlocker to each before threading them in. Tighten in a cross pattern, similar to how you would tighten lug nuts on a wheel, to ensure even pressure across the mating surfaces. Final torque should be firm but not excessive, typically 25 to 30 foot pounds for most models.
Blade Guard and Guide Post Upgrades
- Remove the original blade guard assembly from the upper frame
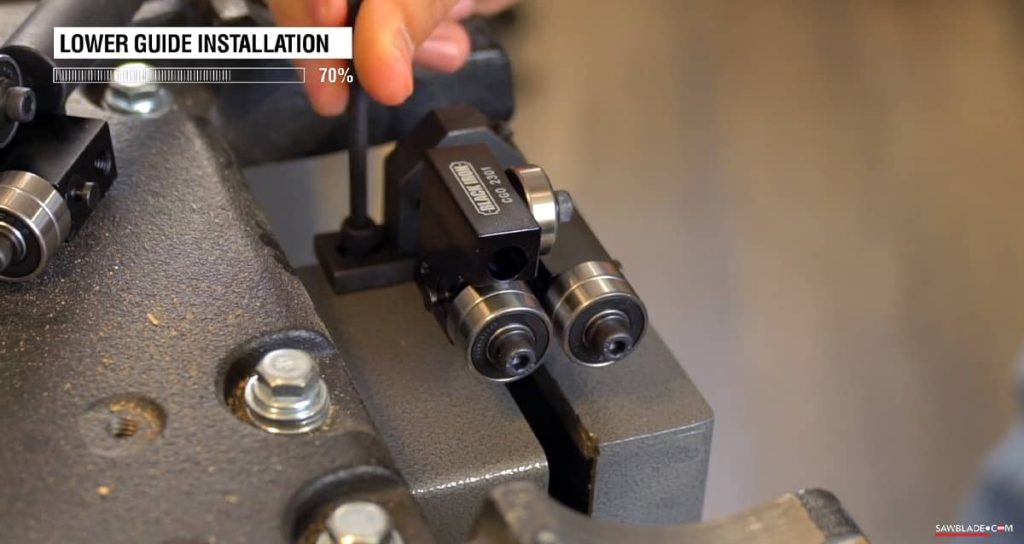
- Install the extended guide post included with your riser block kit
- Attach the longer blade guard to the new guide post
- Verify the guard moves smoothly through its full range of travel
- Adjust the upper guide assembly position to accommodate the new height
- Test that the quick release mechanism still functions properly
- Lubricate the guide post if it feels sticky or resistant
Selecting the Right Blade for Your Expanded Capacity
Your stock blade will not work after installing a riser block, and choosing the correct replacement involves more than just matching the new length. For serious resawing, a wider blade performs better, with 3/4-inch or 1-inch widths being ideal for maximizing the new capacity. Blade tooth count matters too, with 2 to 3 teeth per inch working well for thick stock. Quality bandsaw blades designed for resawing typically feature a hook tooth or skip tooth pattern that clears sawdust efficiently during deep cuts. Carbide tipped blades cost more initially but last significantly longer when processing hardwoods or abrasive materials. Whatever blade you select, order a few extras since having the right blade on hand prevents project delays.
ALSO WORTH READING
Choosing Between a New Blade or a Mill Upgrade?
If you are trying to get better cuts from your bandsaw mill, you might be wondering whether to invest in a higher quality blade or put that money toward mechanical improvements. We put together a detailed guide that walks through the real performance differences between these two approaches. It covers what actually makes the biggest impact on cut quality and efficiency, so you can spend your budget where it counts most.
Post Installation Alignment and Calibration
- Check that the upper and lower wheels remain coplanar using a straightedge
- Verify the table sits at 90 degrees to the blade using a reliable square
- Adjust wheel tracking so the blade rides centered on the tire crowns
- Set blade tension according to manufacturer specifications for the blade width
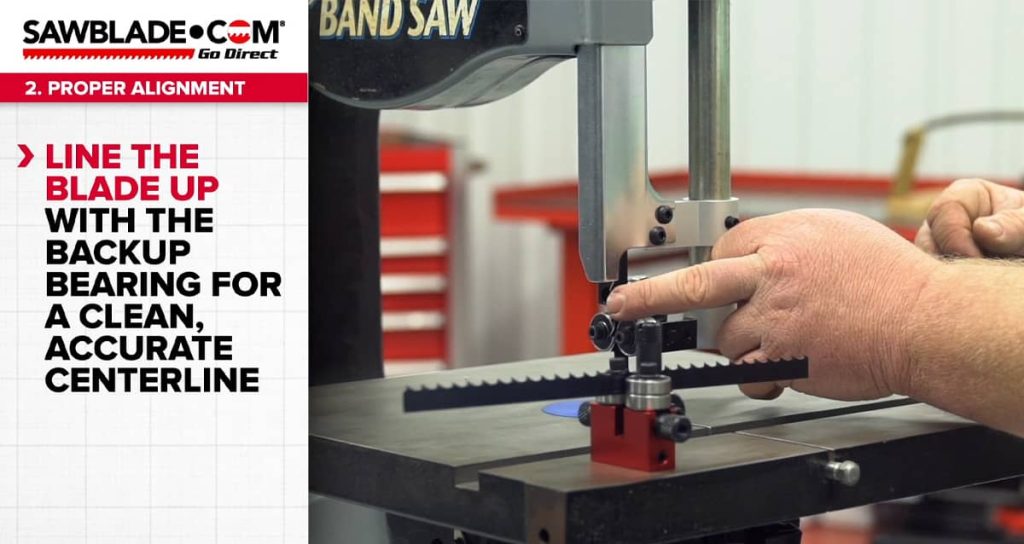
- Position upper guides approximately 1/8 inch above your workpiece height
- Test side guide and thrust bearing clearances with a feeler gauge
- Run the saw briefly without cutting to check for vibration or unusual sounds
Common Installation Mistakes and How to Avoid Them
The most frequent error during riser block installation involves improper bolt torque, either too loose or too tight. Under tightened bolts allow frame flex during heavy cuts, which affects blade tracking and cut quality. Over tightened bolts can crack cast iron frames, especially on imported machines with less forgiving metallurgy. Another common mistake is reusing the original blade guard and guide post, which simply cannot reach low enough to provide proper support near the table. Bandsaw accessories like upgraded guide systems often make sense to install during this process since you already have the saw partially disassembled. Finally, many woodworkers forget to recalibrate their blade tension indicator after installation, leading to either under or over tensioned blades that wear prematurely or damage wheels.
Maximizing Performance After Your Riser Block Upgrade
With your riser block properly installed, your 14-inch bandsaw can handle work that previously required a much larger and more expensive machine. However, reaching the full potential of this upgrade requires attention to technique. Feed rate becomes more important with deeper cuts, as pushing too fast causes blade deflection and wavy cuts. A quality resaw fence that you can fine tune for blade drift makes a noticeable difference in consistency. Consider adding a mobile base to your saw since the increased height raises the center of gravity slightly. For bandsaw blade selection, keeping several blade widths on hand lets you match the blade to each specific task, switching between a 1/4-inch blade for curves and a 3/4-inch blade for resawing without major downtime.
Troubleshooting Issues After Installation
- Blade wanders during cuts, indicating wheel alignment needs adjustment
- Excessive vibration suggesting bolts need retightening or blade is damaged
- Motor strains under load, possibly requiring pulley ratio changes
- Upper guides cannot reach close enough to the table, check guide post installation
- Blade tension cannot reach proper level, verify you have the correct blade length
- Tracking adjustment runs out of range, inspect wheel tires for wear
- Frame feels unstable, confirm all mounting hardware is properly torqued
Making the Most of Your Increased Resaw Capacity
A properly installed riser block transforms what your 14-inch bandsaw can accomplish without requiring the expense or floor space of a larger machine. The ability to resaw 10 or 12 inch wide boards opens up techniques like bookmatching and sequential veneering that add real value to your projects. Take time during installation to do each step correctly rather than rushing through, as a careful approach now prevents frustration and wasted material later. With the right blade mounted and your guides dialed in precisely, your upgraded bandsaw will deliver clean, consistent cuts through thick stock for years of productive use in your shop.