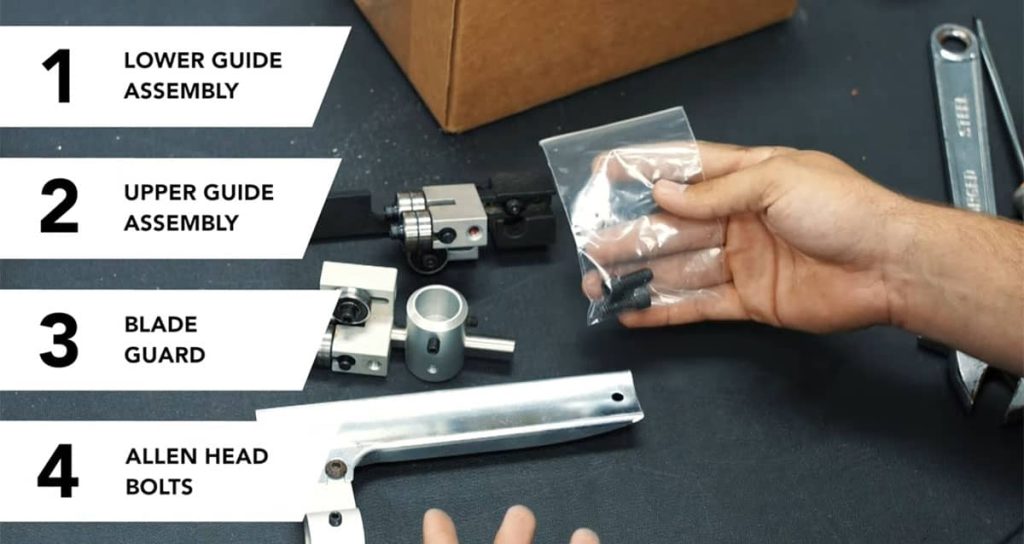
Why Guide Systems Matter
If you frequently use a bandsaw, you are aware that accuracy depends on the steadiness of the blade. Worn or misaligned guides are associated with a number of cutting problems, such as drifting, rough finishes, or excessive wear. Selecting the appropriate replacement kit and ensuring consistent performance are made easier when you understand the functions of each component.
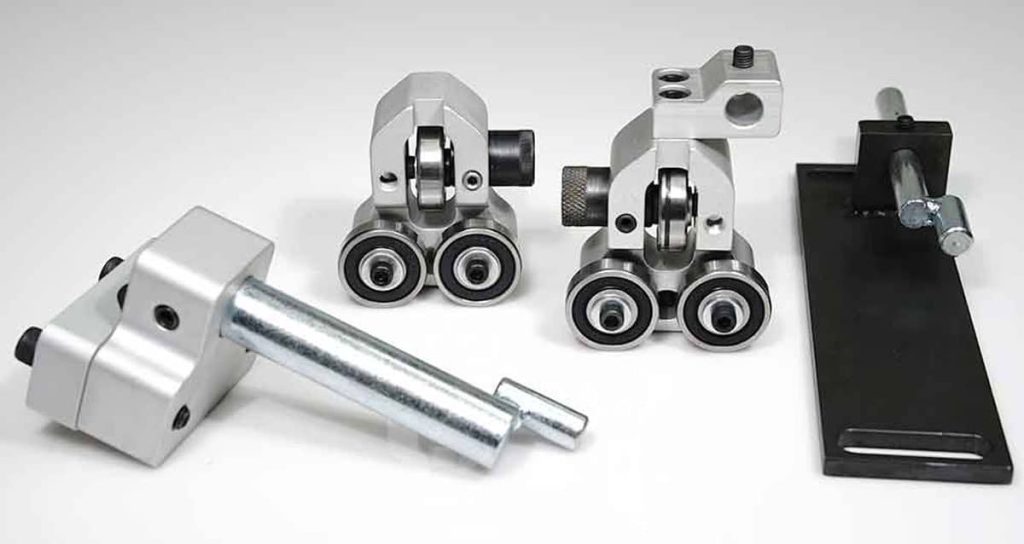
Components in a Guide Kit
Most bandsaws feature two assemblies, one above the worktable and one below. Within these, you’ll typically find:
-
Thrust bearing
-
Side bearings or side blocks
-
Guide blocks in some setups
-
Hardware for mounting
-
Adjustment controls
Thrust Bearings
This bearing sits directly behind the blade to stop it from being pushed backward under pressure. Ball-bearing styles are common, while ceramic versions handle heat and friction more effectively. Signs it’s time for replacement include noise, heat buildup, or visible wobbling. Always match your saw’s specifications when selecting replacements.
Side Guides and Bearings
Side guides prevent lateral blade movement and keep alignment true. These may come as rotating bearings, steel blocks, or low-friction options like graphite-infused “cool blocks.” Wear shows up as grooves, noise, or imprecise cuts. Ceramic side guides are preferred by many woodworkers for heavy-duty resawing.
Guide Blocks
In certain types, stationary blocks are used in place of bearings. These come in ceramic, phenolic, or steel and support the blades laterally. Burned cuts, deep grooves, or cracking indicate that it’s time for replacement. Cool blocks are frequently the best option for delicate scroll work.
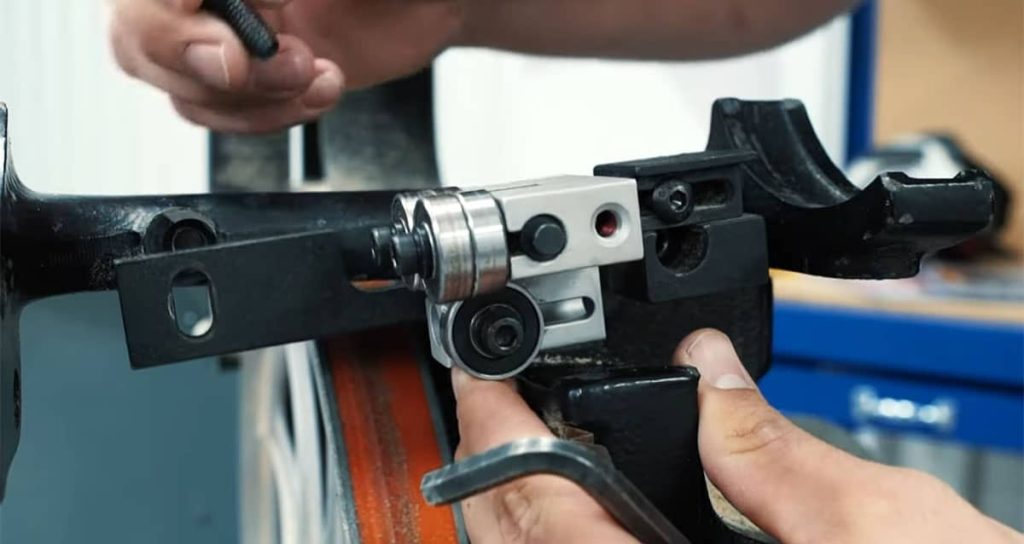
Mounting Hardware
Bolts, pins, and screws secure the guide assemblies. Worn or corroded parts can reduce stability and accuracy. Many replacement kits include fresh hardware, making installation straightforward.
Adjustment Mechanisms
Knobs, cams, or screw systems let you fine-tune blade alignment. If they become stiff, loose, or unreliable, replacements may be needed. Some upgrade kits offer more precise, tool-free controls for quicker setup.
Bandsaw Guide Kit Overview
| Component | Function | Wear Indicators | Replacement Notes |
|---|---|---|---|
| Thrust Bearing | Stops backward blade movement | Noise, wobble, overheating | Ceramic lasts longer, match size needed |
| Side Guides | Control side-to-side blade movement | Grooves, vibration, misalignment | Options: steel, cool blocks, ceramic |
| Guide Blocks | Support blade in place of bearings | Cracks, grooves, burning marks | Best pick depends on cutting style |
| Mounting Hardware | Holds guide assemblies securely | Corrosion, loose fit, stripped | Replace with included hardware kits |
| Adjustments | Allows fine blade alignment | Slipping, stiffness, poor tracking | Tool-free upgrades offer quick accuracy |
Picking the Right Kit
Start by examining the model and brand of your saw. Kits are frequently made for particular machines and frames. Additionally, think about your primary use case. Metal-cutting kits are designed to withstand higher heat loads, whereas wood kits concentrate on dust resistance.
Benefits of an Upgrade
Aftermarket kits usually feature sealed ball bearings inside tough aluminum housings. These provide smoother blade tracking, cut vibration, reduce noise, and extend blade life compared to standard factory guides.
Replacement Tips
-
Clean the guide area before installing replacements
-
Set guides close to the blade without touching it while idle
-
Replace both assemblies at the same time
-
Lubricate parts only if the manufacturer specifies
Get the Right Blade for Your Craftsman 12” Bandsaw
Not sure which blade fits your Craftsman 12” bandsaw? Our article “Craftsman 12” Bandsaw Blades: Sizing Tips and Selection Guide” explains blade lengths, widths, and tooth options so you can cut safely and accurately. Check it out to make the best choice for your projects.
Closing Thoughts
The difference between clean, precise results and rough, uneven cuts is a well-functioning guide kit. Knowing each component and how it works can help you identify what to check for while updating or replacing guides. The correct guide kit can keep your machine operating smoothly, whether you’re maintaining an older saw or making improvements to your current configuration.