Getting More From Your Entry-Level Bandsaw
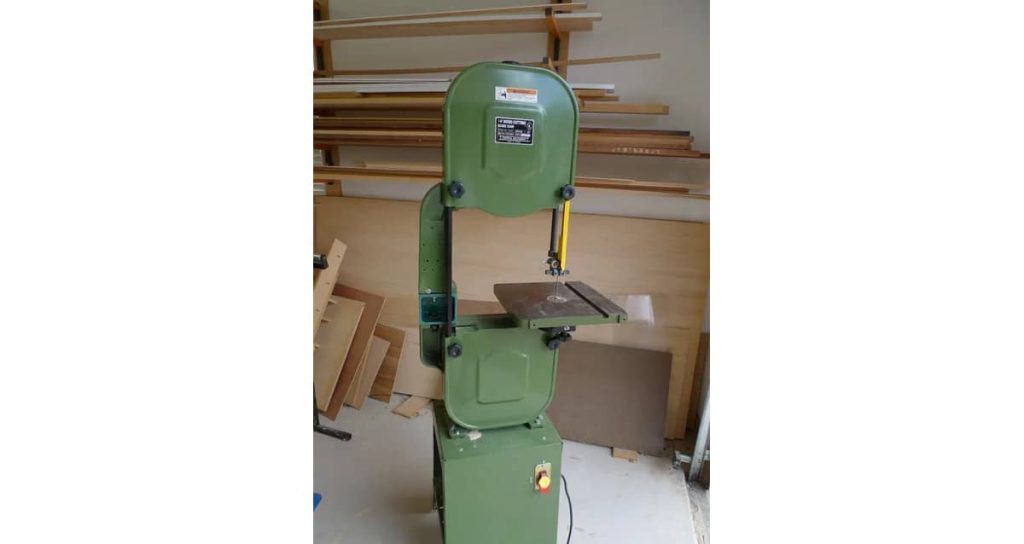
The Central Machinery 14″ bandsaw offers woodworkers and hobbyists an accessible starting point for curved cuts, resawing, and general shop work, but many owners discover the machine has limitations right out of the box. Stock blade guides tend to wear quickly, generate excessive friction, and allow the blade to wander during cuts that demand precision. The good news is that with a few targeted upgrades and proper setup techniques, you can transform this budget-friendly machine into a reliable performer capable of accurate, consistent cuts. This guide walks through practical steps to improve blade tracking and cutting accuracy on your Central Machinery 14″ bandsaw, focusing on real solutions that make a noticeable difference in everyday use.
Common Signs Your Bandsaw Needs Attention
- The blade drifts to one side during straight cuts, requiring constant correction at the fence
- You notice burn marks on the wood, indicating excessive friction or a dull blade
- The blade makes unusual clicking or grinding sounds during operation
- Cut surfaces show visible washboarding or inconsistent saw marks
- The blade frequently slips off the wheels despite proper tensioning
- Your guides feel loose, worn, or make contact with the blade teeth
- Resawing produces tapered cuts that are thicker on one end than the other
Why Stock Guides Fall Short on Budget Bandsaws
Factory-installed blade guides on the Central Machinery 14″ bandsaw are often the weakest link in the system. Most stock guides use simple metal blocks or low-quality bearings that create friction against the blade rather than supporting it properly. This friction generates heat, accelerates blade wear, and makes precise tracking nearly impossible during extended cuts. When you are resawing thick stock or following intricate curves, these limitations become painfully obvious. The blade wanders, the motor works harder than necessary, and your finished cuts lack the clean edges you need for quality joinery or visible surfaces.
Understanding Blade Tracking Fundamentals
Proper blade tracking means the blade runs consistently in the same position on both wheels without wandering forward, backward, or off the wheel entirely. On a well-tuned bandsaw, the blade should ride in the center of the tire or slightly toward the front, depending on your preference and the manufacturer’s recommendations. Tracking is controlled by the tilt of the upper wheel, which you adjust using the tracking knob at the back of the upper housing. Before making any tracking adjustments, always ensure the blade is properly tensioned and that the tires are in good condition. Worn, cracked, or hardened tires can make consistent tracking impossible regardless of how carefully you adjust the wheel angle.
Blade Width and Recommended Applications
| Blade Width | Best Use | Minimum Curve Radius | Ideal for Central Machinery 14″ |
| 3/16″ | Tight scrollwork and intricate patterns | 3/16″ | Yes, with proper guides |
| 1/4″ | General curves and small radius work | 5/16″ | Yes |
| 3/8″ | Moderate curves and light resawing | 1/2″ | Yes |
| 1/2″ | General purpose cutting and resawing | 1″ | Yes |
| 3/4″ | Heavy resawing and straight cuts | 2.5″ | Yes |
| 1″ | Maximum resawing capacity | 5″ | Yes, with upgraded guides |
The Role of Precision Roller Guides
Upgrading to sealed ball bearing roller guides is one of the most effective improvements you can make to a Central Machinery 14″ bandsaw. Unlike friction-based block guides, roller bearings spin freely alongside the blade, providing support without resistance. A proper guide system uses three bearings working together, with two positioned on either side of the blade and one serving as a thrust bearing behind the blade. This configuration keeps the blade running straight while allowing it to move freely through the cut. The result is cleaner cuts, quieter operation, and significantly longer blade life because the blade experiences far less heat and wear during use.

Step by Step Guide Upgrade Installation
- Unplug the bandsaw from the power source before beginning any work
- Release the blade tension completely using the tension adjustment knob
- Remove the existing blade and set it aside
- Unbolt the factory guide assemblies from both the upper and lower positions
- Clean the guide posts and mounting surfaces thoroughly to remove sawdust and debris
- Confirm your upper mounting post diameter is 7/8″ for compatibility with most upgrade kits
- Attach the new roller guide brackets to the upper and lower mounting positions
- Install the side bearings first, leaving enough clearance for the blade to run freely
- Mount the thrust bearing behind the blade path
- Reinstall the blade and tension it according to manufacturer specifications
- Adjust all bearings so they nearly touch the blade without creating drag
- Rotate the wheels by hand to verify the blade tracks properly before powering on
Fine Tuning Your Blade Guides for Best Results
After installing upgraded guides, proper adjustment makes the difference between mediocre and excellent performance. The side bearings should be positioned just behind the blade gullets, not touching the teeth, with approximately the thickness of a dollar bill between each bearing and the blade body. The thrust bearing should sit about 1/64″ behind the blade when the saw is not cutting and only make contact when the blade is pushed backward by cutting pressure. Take your time with these adjustments and check them with the blade both stationary and spinning slowly. Even small misalignments can cause tracking problems or premature wear on your bandsaw blades, so precision during setup pays off with every cut you make afterward.
ALSO WORTH READING
More Tips for Bandsaw Maintenance
If you want to keep your bandsaw running smoothly, tire care is another area worth exploring. Many woodworkers wonder whether waxing their bandsaw tires is helpful or harmful. We cover the pros, cons, and expert recommendations in our article “Should You Wax Bandsaw Tires? What Woodworkers Need to Know.” It’s a quick read that could save you time and frustration in the shop.
Maintaining Proper Blade Tension
- Use the tension scale on your bandsaw as a starting point, not a definitive setting
- Increase tension slightly beyond the marked setting for resawing operations
- Check tension by pressing the blade from the side and observing deflection
- A properly tensioned blade should deflect about 1/4″ when pressed firmly with your finger
- Release tension when the saw will not be used for extended periods to preserve tire shape
- Retension and check tracking every time you change blades
- Inspect the tension spring periodically for signs of fatigue or weakening
Troubleshooting Persistent Tracking Issues
When blade tracking problems continue despite proper adjustment, look beyond the obvious causes. Worn or glazed tires are a frequent culprit that many owners overlook. The rubber tires on your bandsaw wheels should be slightly tacky and free of cracks, hardening, or embedded debris. If the tires are slick or have visible cracks, replacing them often solves tracking problems immediately. Another common issue is a bent or damaged blade that will never track properly no matter how carefully you adjust the machine. Hold a suspect blade up and sight down its length to check for twists or kinks. Finally, verify that both wheels are coplanar, meaning they sit in the same plane when viewed from above. Misaligned wheels create tracking problems that no amount of adjustment can fully correct.
Selecting the Right Blade for Your Work
- Choose 3 to 4 teeth per inch for fast cuts in thick softwood and resawing
- Select 6 teeth per inch for general purpose cutting in hardwood up to 3″ thick
- Use 10 to 14 teeth per inch for thin stock, plywood, and smooth finish cuts
- Match blade width to your tightest planned curve radius
- Consider skip tooth or hook tooth patterns for aggressive cuts in thick material
- Opt for regular tooth patterns when cutting thin material or requiring smooth surfaces
- Keep multiple blade types on hand so you can switch based on the task at hand
Putting It All Together for Reliable Performance
Improving accuracy and blade tracking on a Central Machinery 14″ bandsaw comes down to addressing the machine’s limitations systematically rather than expecting one adjustment to fix everything. Start with a quality blade guide upgrade kit designed specifically for your machine, confirm compatibility by measuring your upper mounting post diameter, and take your time during installation and adjustment. Maintain proper blade tension, keep your tires in good condition, and select appropriate blades for each type of cut. With these fundamentals in place, your budget bandsaw can deliver cuts that rival machines costing several times more, making it a genuinely useful tool rather than a source of constant frustration in your shop.