Installing a riser block on your Delta 14-inch bandsaw is a practical way to expand its cutting range and handle larger stock. This upgrade allows your saw to take on resawing and advanced woodworking tasks that require additional cutting height. To ensure smooth and accurate results, it’s essential to understand how riser block kits work, which models they fit, and how to install and adjust them correctly.
Understanding the Role of a Riser Block
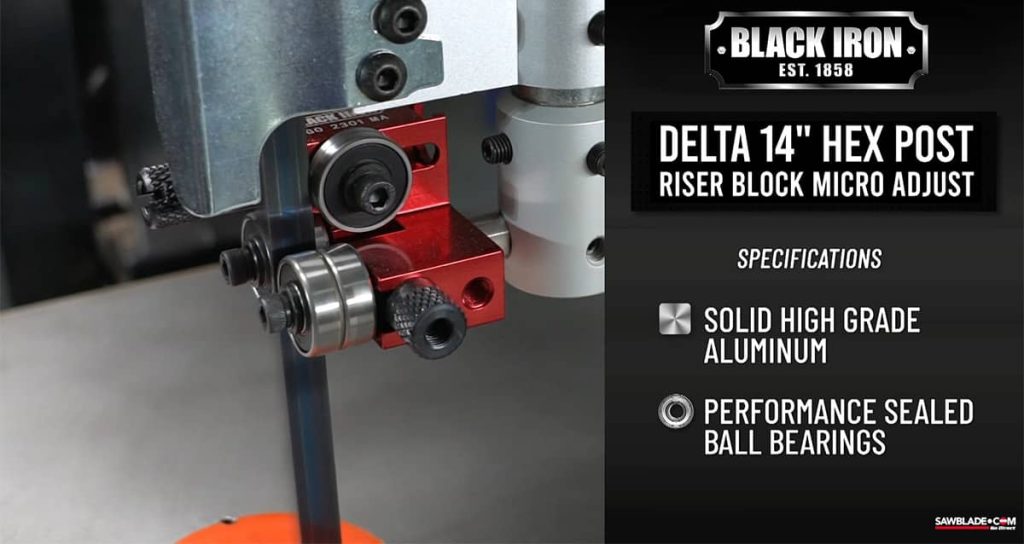
A riser block increases the distance between the saw table and the upper blade guides, allowing for thicker cuts. The block fits between the two frame sections of the saw, extending the column and requiring both a longer blade and blade guard. Once installed, it turns your standard Delta 14-inch bandsaw into a more capable machine for woodworking projects that demand greater material height.
Benefits of a Riser Block Upgrade
-
Increases cutting height by 4 to 6 inches on most models
-
Enables cutting and resawing of larger or wider workpieces
-
Extends the usefulness of older Delta saws without replacement
-
Works well with modern bearing guides for improved accuracy
-
Expands cutting versatility for various woodworking applications
Checking Riser Block Compatibility
Delta 14-inch bandsaws come in different configurations, and not every riser kit fits every model. Many older Rockwell and Delta designs share similar frame geometry, but variations in pin spacing and post shape are common. Before purchasing, verify whether your saw has a round or hex post and confirm that the mounting holes align properly. Doing this early avoids modification work and installation delays.
Performance Changes After Adding a Riser Block
Installing a riser block not only adds height but also alters blade dynamics and frame balance. The longer blade path affects tension and vibration, which can influence cutting quality. After setup, check the blade tracking, wheel alignment, and motor load carefully. For saws with smaller motors, slower feed speeds and proper blade selection are key to maintaining precision and preventing strain.
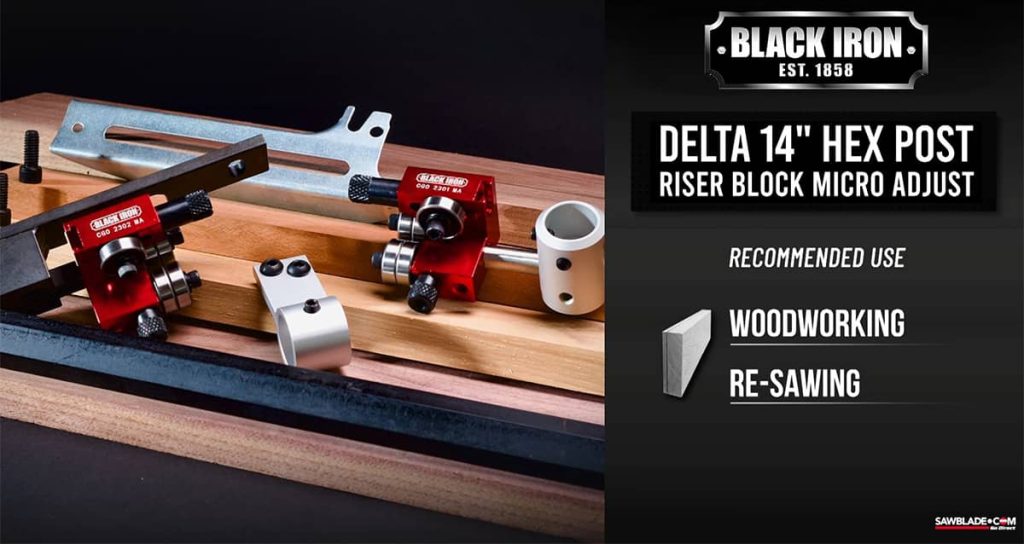
Common Riser Block Kit Components
| Component | Purpose | Notes |
|---|---|---|
| Cast iron or steel riser block | Increases saw frame height | Must fit Delta 14-inch design |
| Extended blade guard | Provides protection at greater cutting height | Required for safe operation |
| Longer blade | Matches the new blade path | Size varies per kit |
| Guide post adapter | Maintains upper guide alignment | For round or hex post models |
| Mounting hardware | Bolts, pins, and washers to secure the riser | Tighten evenly to prevent vibration |
| Throat plate and cover | Fits extended cutting area | Included with higher-quality kits |
Preparing for the Installation
Before starting, review the riser kit instructions and make sure every component is present. Disconnect the power, remove the existing blade, guard, and table, and have basic tools on hand such as wrenches, punches, and a rubber mallet. Organize small parts as you remove them to make reassembly easier. Proper preparation keeps the process safe and efficient.

Installation Steps
-
Confirm that the riser kit matches your Delta 14-inch bandsaw model
-
Disconnect power and remove the blade and guards
-
Carefully separate the upper frame section
-
Insert the riser block, ensuring the surfaces are smooth and level
-
Align bolt holes and tighten all hardware securely
-
Attach the guide post adapter or bearing guides if provided
-
Install the extended blade guard and throat plate
-
Mount the longer blade, set the correct tension, and test operation at low speed
Adjusting Tension and Alignment
Once installation is complete, fine-tuning the setup ensures smooth performance. The longer blade typically requires different tension, so use your saw’s scale or the deflection method to set it accurately. Make sure the wheels are aligned and the blade tracks properly. Proper adjustment reduces vibration, improves accuracy, and ensures consistent cutting results across thicker materials.
Troubleshooting After Installation
-
Blade wandering or drift: recheck tracking and guide adjustments
-
Excess vibration: verify all bolts are tight and the riser sits flush
-
Motor overheating: reduce cutting feed rate or upgrade the motor
-
Guard fit issues: confirm the extended guard is positioned correctly
-
Blade tension problems: ensure proper blade length and tension setting
Maintenance and Upkeep
To maintain long-term reliability, clean the wheels, bearings, and guides regularly. Inspect riser block bolts for tightness, especially after heavy use. Keep all moving parts lubricated according to your saw’s manual and replace worn tires or dull blades promptly. Routine maintenance helps preserve the saw’s cutting precision and extends its service life.
Recommended Blades and Accessories
-
Use blades between 3/8-inch and 3/4-inch for resawing or thicker cuts
-
Select hook or skip tooth blades for efficient material removal
-
Upgrade to roller bearing guides for smoother blade tracking
-
Keep a spare longer blade available for quick replacement
-
For smaller motors, work at slower speeds to prevent overload
Explore the Best Bandsaw Guide Setup for Your Projects
If you’re unsure whether guide blocks or bearing guides are right for your saw, check out our detailed article “Bandsaw Guide Blocks or Bearing Guides: Which Should You Choose?” It breaks down how each system affects blade stability, cut precision, and maintenance. This helpful read will guide you toward the setup that best matches your woodworking needs and cutting habits.
Adding a riser block kit to your Delta 14-inch bandsaw is a simple yet effective way to expand its cutting capabilities. With proper setup, correct blade selection, and consistent maintenance, your saw can handle a wider range of materials safely and efficiently. Always confirm kit compatibility before purchasing and follow installation instructions carefully to ensure reliable, accurate results every time.